Almost every social networking app allows its users to upload and post an image. Most apps even let you set a profile picture for your account. All these apps access your device’s camera and gallery through an image picker.
In this post, I’ll walk you through the essentials of using an image picker in your React Native app. Eventually, you’ll learn to build a component to upload profile pictures that you can use in your apps right away.
Get Started Adding an Image Picker to Your Expo App
For this demo, I’m using Expo CLI for building React Native apps quickly and easily. To get started, create an Expo CLI project by running the following command:
Then, open the project in an editor.
Install expo-image-picker
Expo provides an easy way to add an image picker in your React Native app. It offers a simple library called expo-image-picker. Let’s install it by running the following command:
Then, jump-start your Expo server by running
Great! Now you’ve installed the expo-image-picker library. But before we can use it, we have to create a component to let our users upload an image. Let’s do that next.
Create an Upload Image Component
Consider the use case of uploading your profile picture in an app. This is how the app’s flow should look: You click a button that opens the image picker. It then allows you to choose an image from your device.
It would be nice to have an independent and reusable component that does the above. For this purpose, let’s create an <UploadImage> component. Create a new file called UploadImage.js. Add the following lines of code inside it:
The above code should display a gray circle on the screen. You can imagine this as a placeholder for your image. This is where the uploaded image will be displayed.
At the bottom of the gray circle, there’s a small button to trigger the image picker’s functionality. Thus, when the user taps on the Upload Image button, the app should let the user choose an image from their device.
Next, create a state image to store the selected image’s URI. This URI will be used to render the image inside an <Image> component. You can then conditionally render this <Image> component to display the image inside the circle.
Render the above <UploadImage> component inside App.js. Your App.js should look like this:
Let’s see how the <UploadImage> component appears on the screen.

You now have a minimal UI template. Awesome! Next, let’s add an image picker to this component to make it functional.
Use expo-image-picker to Select and Upload Images From Your Device
Earlier, you installed the expo-image-picker module. It opens the system UI for choosing an image and getting the selected image’s URI, height, width, etc.
Import the ImagePicker module inside UploadImage.js.
Inside the addImage() method, call the launchImageLibraryAsync() method on the ImagePicker instance as shown below. Since this is an asynchronous method, you can use the await keyword inside addImage().
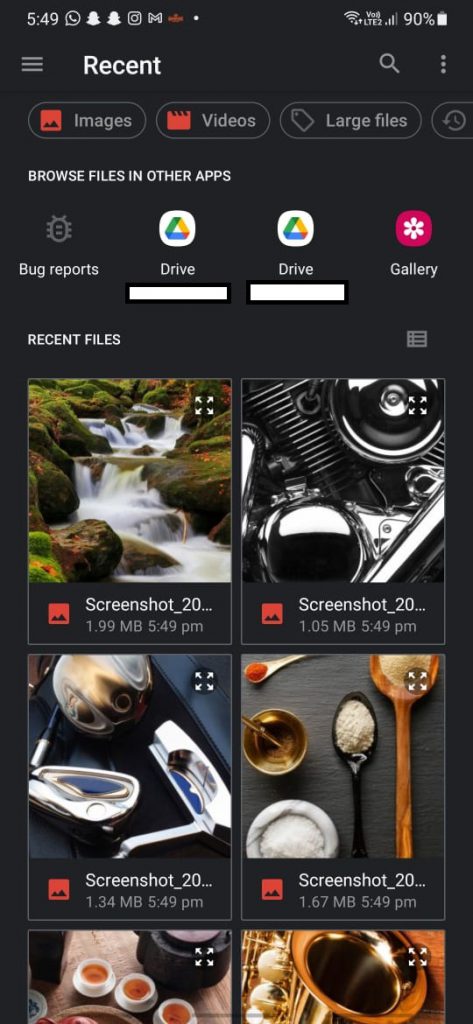
This method is responsible for opening the system UI to select images from the user’s device. On my Android device, it opens the system UI for selecting an image that looks like this:

The launchImageLibraryAsync() method also receives an options object as a parameter. Pass the following options to this method:
Let’s dive deeper and understand what each property means and how to use them.
Allowed File Types
The mediaTypes key validates the chosen files for your image picker. In other words, it tells the image picker which files the user is allowed to select. To simplify this, the ImagePicker module provides a MediaTypeOptions property. You can set it to be any of the following:
- MediaTypeOptions.All to allow both images and video
- MediaTypeOptions.Images to allow only image files
- MediaTypeOptions.Videos to allow only videos
In this case, the user needs to upload an image as their profile picture. For this reason, the mediaTypes property is set to MediaTypeOptions.Images.
Default Editing Interface
The next property is allowsEditing. By default, its value is false. This indicates that the image will be taken as it is on selection. Setting it to true will provide an editing interface after you choose an image.
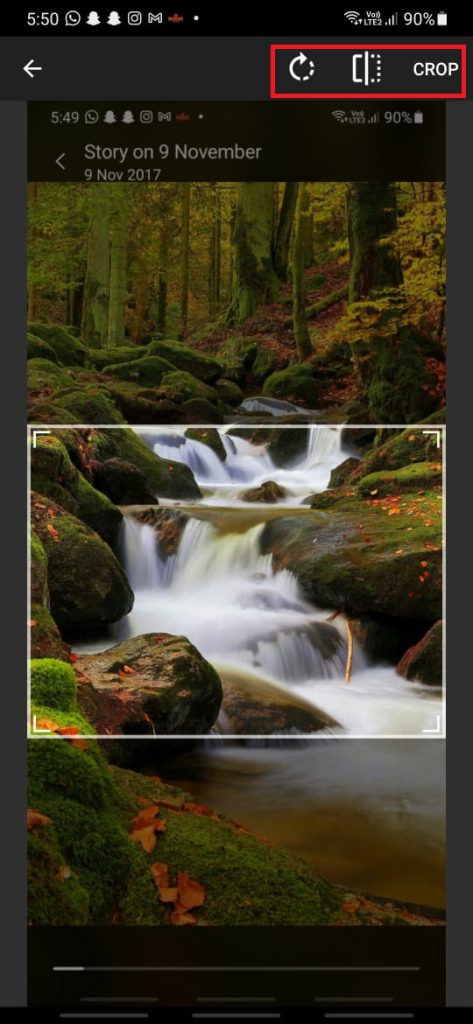
You will be able to crop, rotate, or flip the selected image depending on your OS and system UI. For instance, on my device the editing interface allows me to do all of the above and looks like this:

There’s also an aspect property that specifies a fixed aspect ratio for your cropped image. You can imagine this as a validation check on your cropped image. The editing interface will allow you to crop the image in such a way that it maintains the specified aspect ratio.
Note that the expo-image-picker documentation mentions that the aspect property “is only applicable on Android since on iOS the crop rectangle is always a square.”
Thus, you must be aware that the aspect ratio property will have no effect on iOS devices. If you want, you can skip this property based on the device’s OS.
Image Quality
If you use WhatsApp, you’ve probably noticed how it compresses images and reduces their quality to mitigate the file size. Controlling the amount of compression you want on your images is a great way to upload files faster at low network speed.
You can control the quality of your selected image using the quality property. It takes in an integer representing the rendered image’s quality. You can pass any value between 0 and 1. The former denotes the lowest quality and the latter denotes the highest quality.
For brevity, the value of quality is set to 1 in this case. You can try adjusting this value to see its impact on the rendered image.
Render the Selected Image
Now that you have a functional image picker, let’s render the selected image on the screen. Recall that inside the addImage() function, the ImagePicker.launchImageLibraryAsync() method returns an image object. If you log this object to the console, you’ll notice it has the following properties:
- cancelled, which indicates if the system UI was closed without selecting an image
- width and height, which specify the dimensions of the selected image
- type to denote the file type (image in this case)
- uri property, which holds the URI of the image
Store this image’s URI inside the image state. Your entire addImage() function should now look like this:
Let’s test this out now. Click on the Upload Image button and choose an image. You’ll see the selected image being rendered inside the circle, as shown below:

Notice how the upload button says “Edit Image” instead of “Upload Image.” If you click on the Edit Image button, you’ll be able to choose a different image using the same image picker. You now have a custom and completely reusable upload image component that you can use anywhere in your app.
Check for Gallery Permissions
It’s always a good practice to check if your user has allowed your app to access their device’s gallery. When you use Expo to build and test apps, Expo automatically asks you the necessary permissions.
However, in production, it’s always safe to write the code that takes care of this. You can use a simple method on the ImagePicker instance called getMediaLibraryPermissionsAsync(). It returns an object with a status property.
If the value of status is granted, then your app is allowed to access the user’s gallery. Otherwise, you can show an alert to ask the user to grant necessary permissions. Create the below function that does all of this:
There’s an important thing to note here. You should call this method before any functionalities of your image picker are triggered by the user. To put it another way, call this method before the user clicks on the Upload Image button.
The best place to do so is inside the useEffect. It fires when your <UploadImage> component mounts on the screen.
The above code ensures that the checkForCameraRollPermission() function is fired before the user performs any interaction with the image picker. The first time you use the app, you should see a permissions popup:

Something similar should pop up to your users when they use your app for the first time.
How to Test the Upload Image Component
Let’s test the <UploadImage> component using snapshot testing. A snapshot test is used to validate whether your component renders consistent UI. You can use Jest to easily perform snapshot testing. You can read more about snapshot tests here.
Set up Jest Environment
Install Jest by running
Also, install react-test-renderer by running
Next, head over to your package.json file. First, add a simple script to run the test.
Then, add the following configurations:
Write and Run Snapshot Test
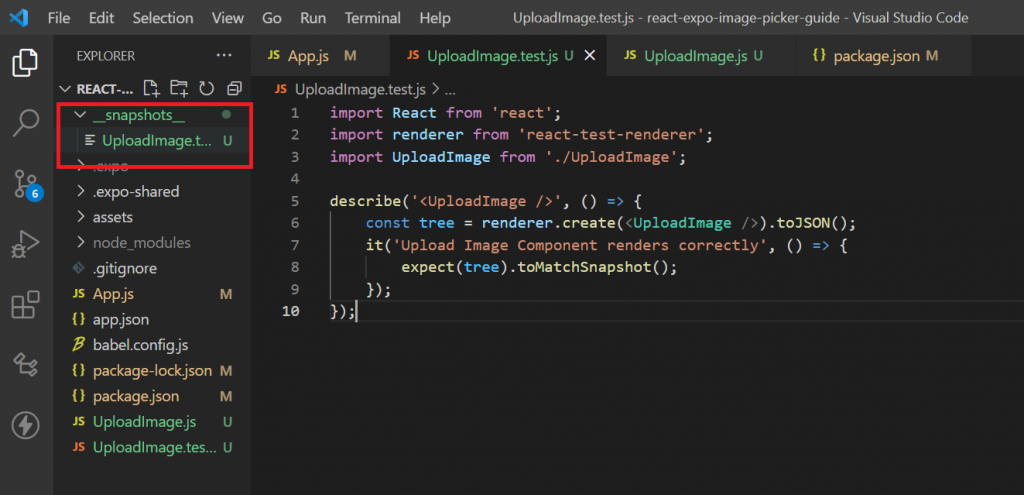
Inside the root directory, create an UploadImage.test.js file. Add the following lines of code:
And that’s it! You’ve written a simple snapshot test for your <UploadImage> component. Use the following command to run the test:
When you run the above command, Jest automatically runs all your test files. In this case, it’ll run your UploadImage.test.js file. The first time you run the test, you should see a success message in your console like this one:

An UploadImage.test.js.snap file would be created inside the __snapshots__ directory.

When you run subsequent tests, Jest will generate a new snapshot. Each of these snapshots will then be validated against the previously stored snapshot inside the __snapshot__ directory. This is precisely how the UI consistency of your <UploadImage> component would be validated.
Jest is great for unit and integration tests, but for more advanced functionality testing, check out Waldo. It offers reliable and automated tests that you can run directly from your browser. It also helps you fix potential issues and integrates well with popular CI/CD tools right out of the box.
Explore Further
This should be a great starting point to add an image picker into your own React Native app. If you’re using React Native CLI for your project, you can check out react-native-image-picker. It’s just as useful and similar to expo-image-picker but for React Native CLI projects.
Also, there’s a lot more you can do with an image picker beyond what I covered in this post. For instance, you can let your users directly take a picture through it. You can even allow users to add videos through it. Having these features on your app could be a dealbreaker for you! You can browse through the docs for some reference on these.
Moreover, you can build your own image picker UI instead of using the system UI for adding images. If you’re ready to build a more interesting image picker for your app, you can try cloning Instagram’s image picker. I’m sure it’s going to be an interesting exercise
Automated E2E tests for your mobile app
Get true E2E testing in minutes, not months.


