Kotest is a great tool for unit testing your Kotlin code, and this is certainly the post for you if you're a Kotlin developer looking for a new testing tool. But I'd recommend the post even if you're not shopping around because Kotest offers quite an interesting and refreshing set of features when you compare it to other testing tools you might already know. Thus, it makes for an excellent addition to the tool belt of any Kotlin dev.
I'll start the post by covering some prerequisites. These are things you need to have in place to follow along with the practical portion of the post. After that, I cover some Kotest fundamentals, talking about what Kotest effectively is, its components, and the different testing styles it supports. Finally, we'll reach the point where you get your hands dirty: a simple, to-the-point guide on how to get started with Kotest.
Let's dig in!
Requirements
For the "tutorial" part of the post, I assume a few things:
- IntelliJ IDEA is installed on your machine. The community version is free.
- You have basic Kotlin knowledge.
- You have some familiarity with unit testing.
Kotest Fundamentals
With the prerequisites out of the way, let's answer some basic questions about Kotest, starting with what it is.
.png)
What Is Kotest?
Here's how Kotest's official page defines what it is: "a flexible and elegant multi-platform test framework for Kotlin with extensive assertions and integrated property testing."
Kotlin isn't a single thing, but three: a test framework, an assertions library, and a property testing framework. And here's where the word flexible from the definition above is justified: the three Kotest components are independent, so you can use them all together or pick just the components you want, along with other tools.
What about the multi-platform part? Kotest is supported on the JVM, JavaScript, and native.
The Different Test Styles in Kotest
Kotest offers ten different testing styles. What is a style, you might ask? It's simply a way of writing or structuring your tests so they make more sense to you. When it comes to functionality, nothing changes.
Here's an example of a test written with the should style, coming directly from Kotest's documentation:
As you can see, the test class inherits from the ShouldSpec class. The test itself consists of a method called should, to which you pass a string argument that describes the test, and then a lambda with the test itself.
Now, let's see a test using the Behavior spec, which allows you to write tests in the BDD—behavior-driven development—style:
Roll Up Your Sleeves: Time to Get Started With Kotest
With the fundamentals out of the way, let's see how to get started with Kotest in practice.
Create a New Project
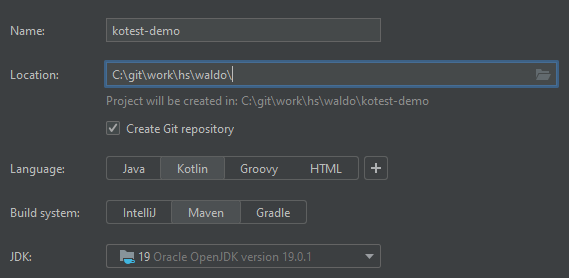
The first step is to create a new project using IntelliJ IDEA. Open the IDE, click on "new project," and fill out the following info:
- Name: kotest-demo
- Location: Pick a location for the project.
- Create Git repository: Mark that if you want, but this assumes you have Git installed.
- Language: Kotlin
- Build system: Maven
Here's what my screen looks like:
Then, click on the Create button. IntelliJ IDEA will create the project and open up the Main.kt file so you can edit it. Close the file, then follow these steps:
- Go to the Project tool windows.
- Expand the src and main folders.
- Right-click the kotlin folder, click on New, and then Kotlin Class/File.
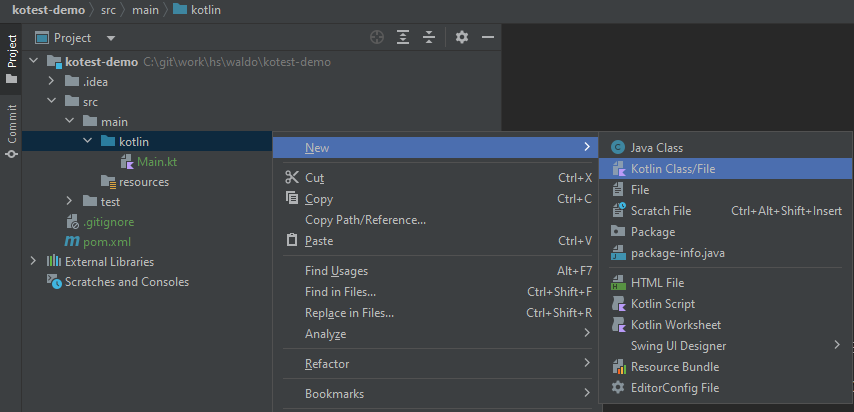
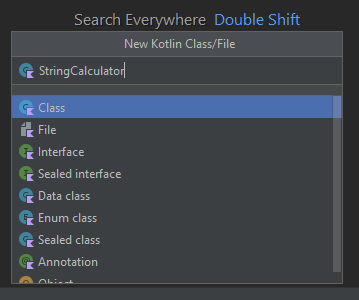
You'll then see a suspended menu with several types of files. Select File, then write "StringCalculator" as the name and press Enter.
After that, you might see a prompt asking whether you want to add the new file to Git. Click Add and, optionally, mark the Don't ask again box. Commit the changes, and let's continue.
Writing the Production Code
What's this toy project all about? I happen to really like this coding exercise known as the string calculator kata, proposed by Roy Osherove. A coding kata is a programming exercise in which you solve a problem through the use of TDD—test-driven development—working in super tiny steps.
The string calculator kata asks you to create a class with a single method called add(). The add() method takes as an argument a string containing integers separated by a comma. These are the rules for the method:
- Return an integer equal to the sum of the numbers in the string.
- Numbers larger than 1,000 should be ignored.
- An empty string results in zero.
- A string with a single number should result in that same number.
There are more rules, but I'll ignore those for brevity's sake. This is a working solution in Kotlin:
The code above does this:
- First, it checks whether the argument is null or contains an empty/blank string. It returns zero if so.
- After that, it splits the argument received using the comma as a delimiter.
- Then it converts each string part to an integer.
- It then filters the integers so only numbers less than or equal to 1,000 remain.
- Then it sums the remaining numbers and returns.
Paste the following code on your StringCalcutor.kt file. Then, replace the contents of your Main.kt file with the following:
If you then run the application—Run > Run Main.kt, or Shift+F10—you'll be prompted by the numbers. Then you'll see the numbers you entered, followed by their sum.
Time to Test!
Let's start by installing the necessary Kotest components.
Installing Kotest
Go to your pom.xml file and add the following inside the <plugins> section:
Then add the following inside <dependencies>:
After editing the pom.xml file, click on the maven update icon in the upper-right corner of your screen so those dependencies can be resolved.
Installing the Kotest IntelliJ IDEA Plugin
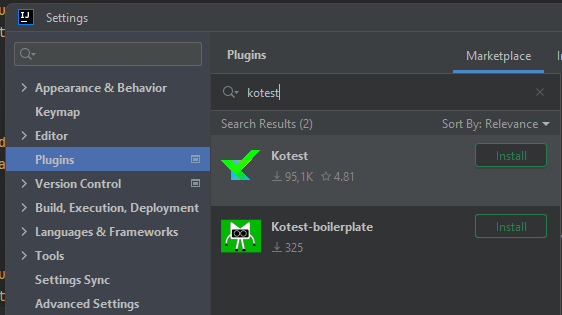
There's one step left before you can start writing your tests: installing the Kotest plugin for IntelliJ.
On IntelliJ, go to File > Settings... > Plugins. While on the Marketplace tab, search for "kotest," then select the first result and click on Install:
Writing and Running Your First Test
Go to the Project tool window. Expand the test folder, right-click on kotlin, and then go to New > Kotlin Class/File. Choose class as the type for the new file, and name it "StringCalculatorTest.kt".
After the file is created, replace its contents with the following:
The test above uses the fun spec. As you can see, the test consists of invoking a method called test(), to which we pass its name and then the actual test code. We call the add function passing an empty string as an argument, then use the shouldBe matcher to assert that the result should be zero.
Let's now run the test. If you installed the Kotest plugin correctly, you should see green play signs next to the class and method names:

Click on either play sign and then on Run StringCalculatorTest... The test will run very quickly, and you'll soon see the result:
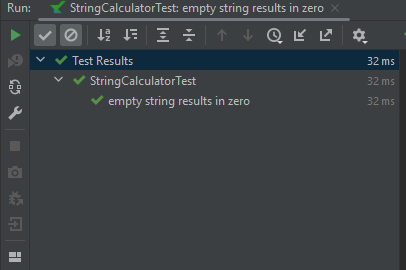
Adding More Tests
Let's add more tests using different styles. First, create a new class containing the following code:
The test above uses the should style, an original style by Kotest—that isn't inspired by existing tools. This is similar to the fun spec, but we use the word should instead of test.
.png)
Is Your Testing Framework Boring You? Kotest to the Rescue!
By this time, one would be forgiven for thinking that testing tools have reached their apex and don't have anything new to offer.
But one would be mistaken.
At least when it comes to Kotlin, you have an excellent choice for testing frameworks in Kotest. It's multiplatform, very flexible, and offers much more than we've covered in this post. Here are some features you might want to check out:
- Support for data-driven testing
- Dynamic tests
- Support for non-deterministic testing
- Test factories
The list above is far from exhaustive, and there's plenty to learn and have fun with. While you're exploring testing tools, remember that unit testing, despite being very important, isn't the only type of test automation you should pay attention to. Waldo is a codeless test automation tool for mobile functional tests that offers flakiness detection features, record and playback, and support for complex features and user workflows.
Automated E2E tests for your mobile app
Get true E2E testing in minutes, not months.


