


Toast messages in React Native are a way to display information to users that disappears after a few seconds.
A built-in component shows toast messages in Android. However, we need to write custom code to show toast messages in the iOS platform.
In this post, we'll create a small app and see different kinds of toast messages. We'll use React Native CLI for the project and run the app on both an iOS simulator and Android emulator.
The Project
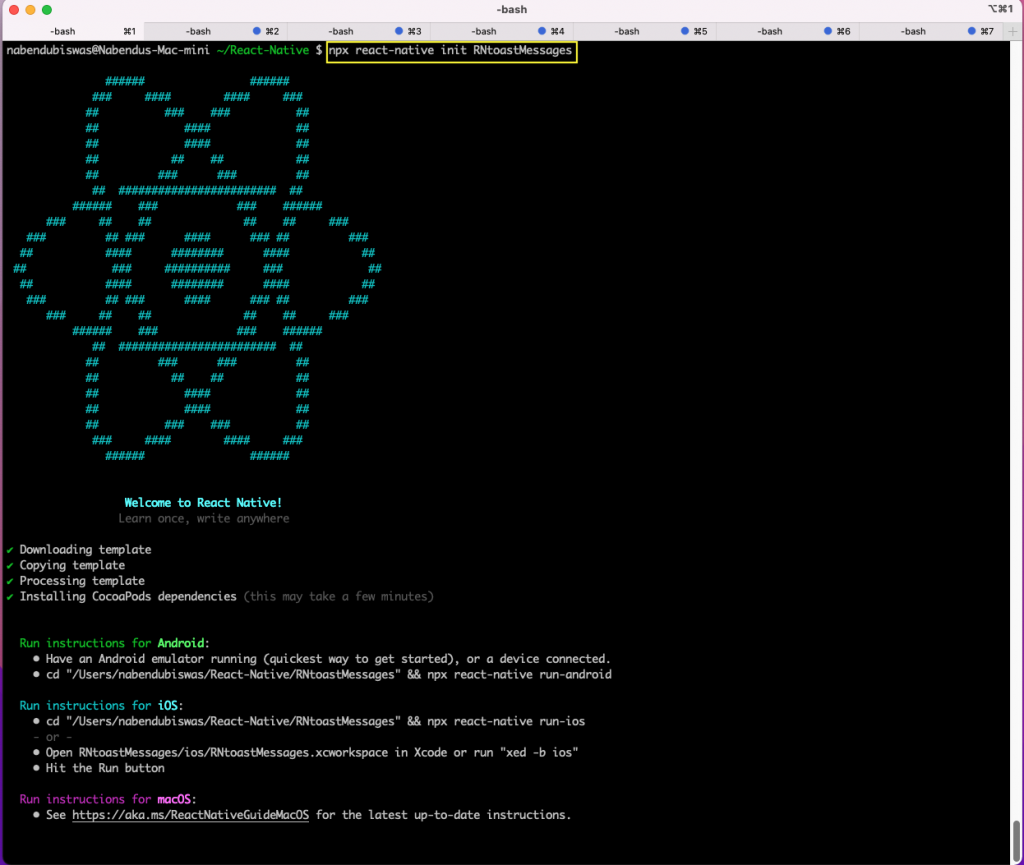
Let's create a project using React Native CLI. Run the command below from the terminal on a Mac or command line in Windows.
After installation is done, we'll see this screen:
Starting the Project
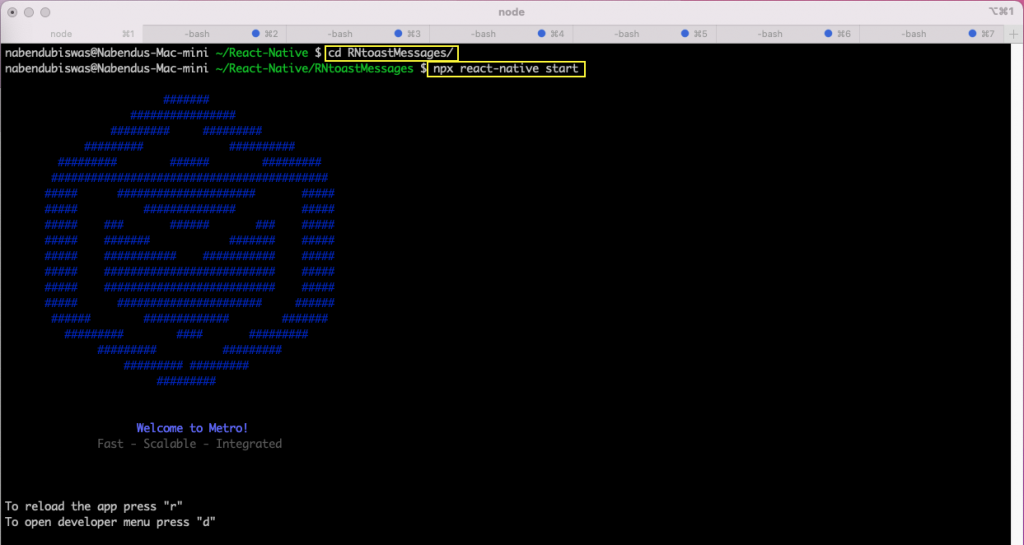
To start our project, first change to the directory. After that, run the npx react-native start command.
Next, run the npx react-native run-ios command from another terminal to start the project in the iOS simulator.
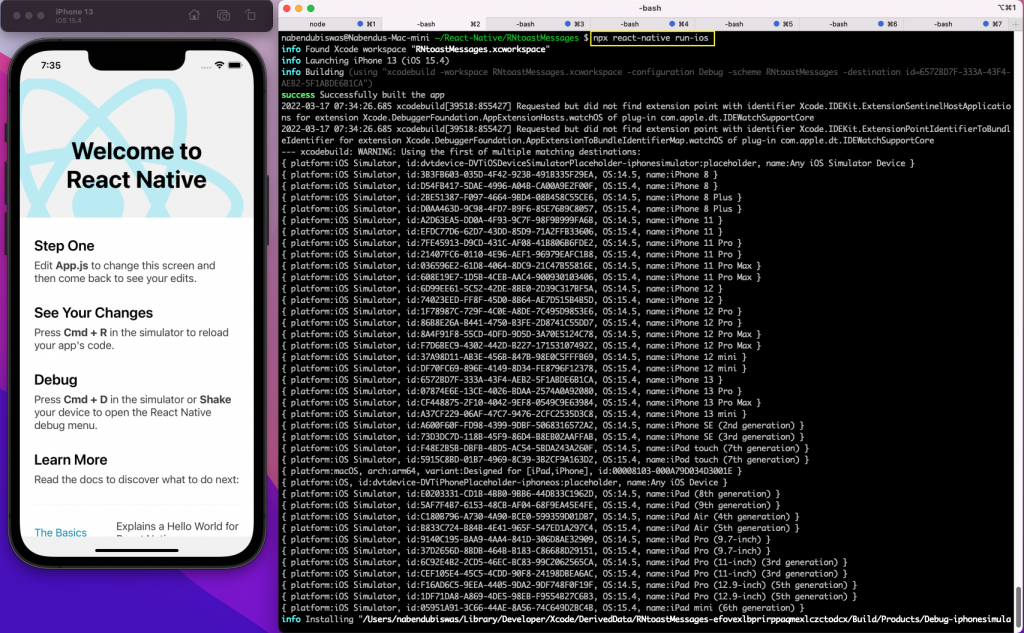
Similarly, run the npx react-native run-android command to start the project on an Android emulator.
.png)
Initial Setup
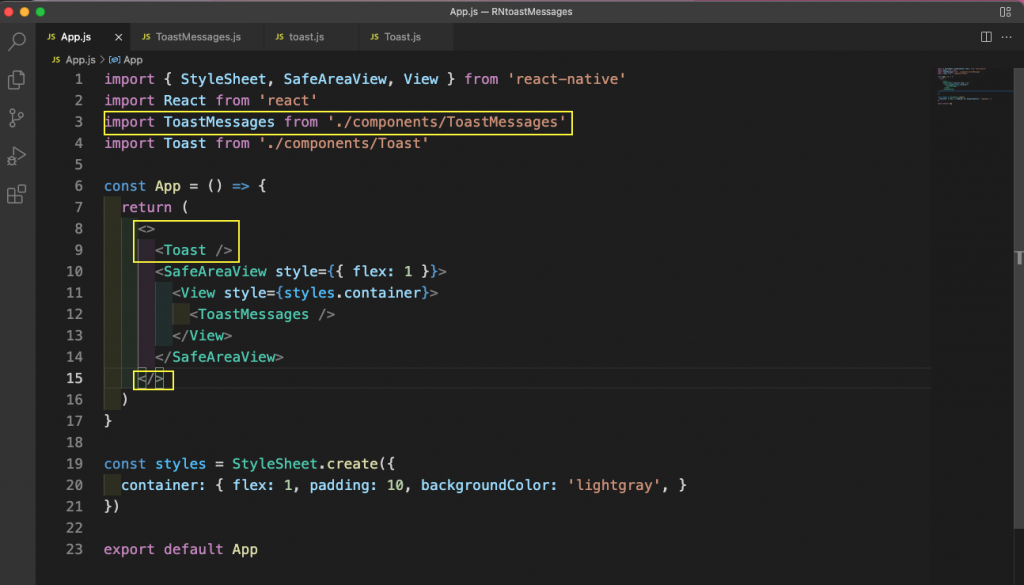
First, remove everything from the App.js file and add the content below in it. Here, we're showing a component called ToastMessages inside a SafeAreaView and View with some styles.
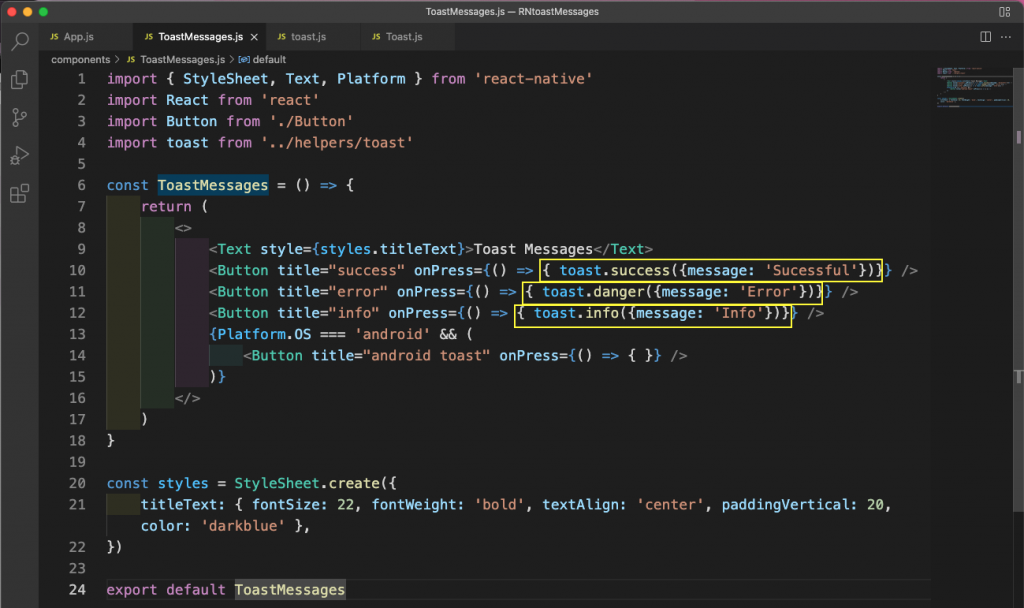
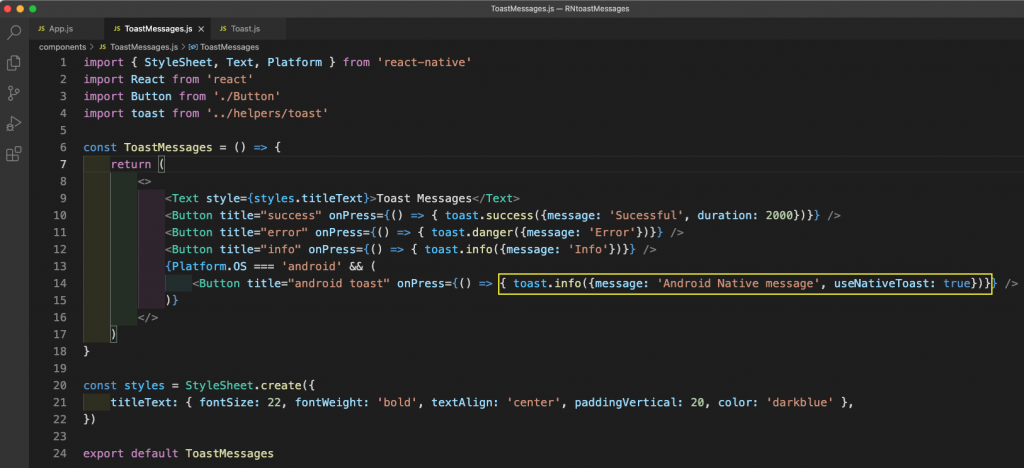
Now, create a components folder in the root directory and create a file called ToastMessages.js inside it. Put the content below in it. Here, we have styled text and four buttons created using the Button component.
We'll create the Button component next. Here, we're just passing props to it. Also, note that we have a special button only for the Android platform. Later, we'll create a native Android toast in it.
Now, create a Button.js file in the components folder and add the content below in it. Here, we're receiving the title and onPress props and creating a button through
TouchableOpacity.
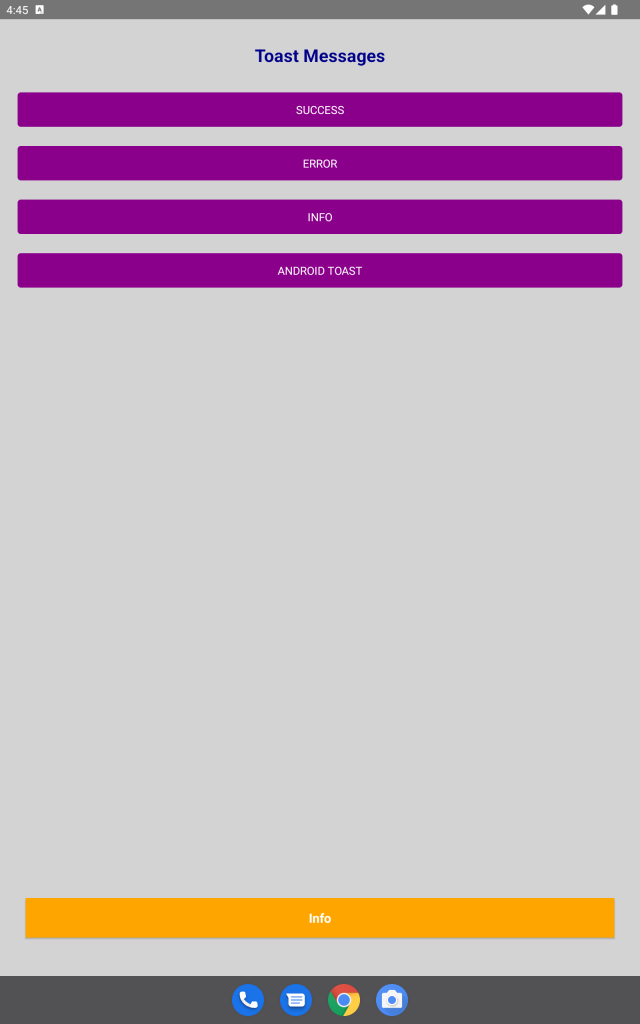
Now, you should see the screen below on the Android emulator and iOS simulator. Note the absence of the Android Toast button on the iOS simulator.

Creating Toast Messages
First, let's create a helper function to show toast messages. To do so, create a folder called helpers in the root directory. Add a file titled toast.js in it and add the content below.
Next, we have the info, success, and danger functions that are emitting event using the React Native DeviceEventEmitter. In this case, we're emitting a string called SHOW_TOAST, as well as options and a different type.
Next, create a file called Toast.js inside the components folder and add the content below. Here, we're adding listener in the useEffect hook. In this case, we're listening for the event emitted from the Toast.js file. We've also removed the event once the component is unmounted.
When we receive an event, we're calling a function onNewToast and just console logging the received data in it now. We'll add more logic in it later.
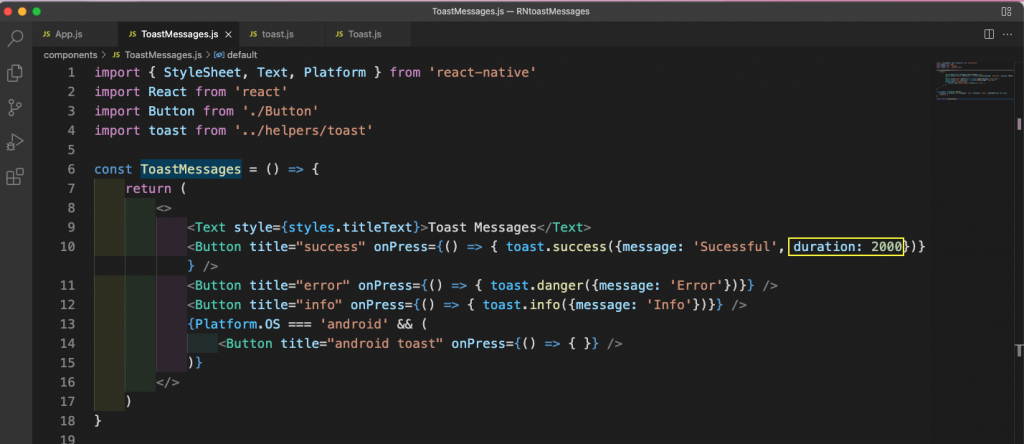
Now, we'll update the ToastMessages.js file to use the Toast.js function and send different messages on different press events.
We'll also add the Toast component outside all components in the App.js file.
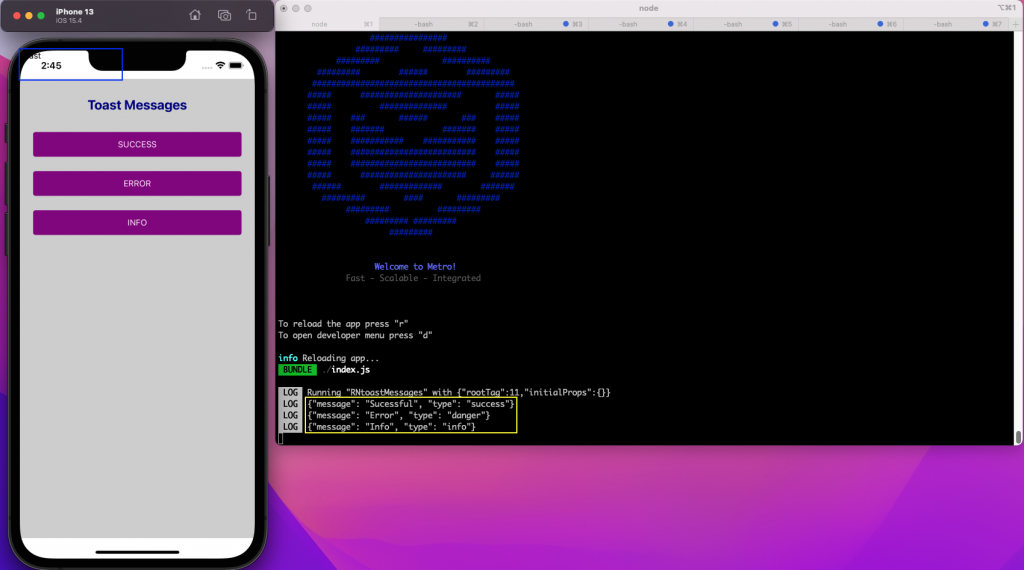
Next, from the Android emulator or iOS simulator, press any button, and we'll see the console logs for it. Also, see the toast component is not shown at the correct place.
Showing Toast Messages
Pressing any button allowed us to get different data into the Toast.js component. Now, let's show a toast message at the correct place. We'll also see a different color for each toast message with different text in it.
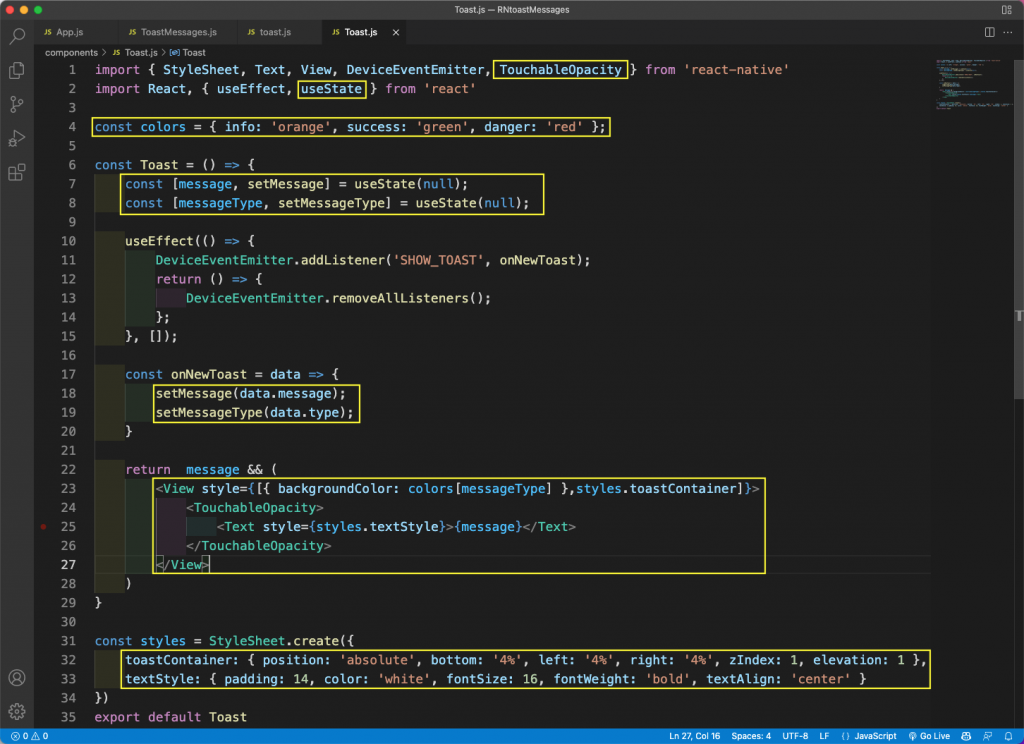
First, in the Toast.js file, add two state variables of message and messageType. After that, when we receive the toast message, we'll set these state variables with message and type.
In this case, we're checking whether we got a message in the return statement. After that, we're showing a View with a button created with TouchableOpacity. We're using different styles for both the container and text.
Use the position "absolute" to place the box at the exact bottom. Also, we have a color variable at line 4 through which, depending on the message, we'll add different background color to the container.
Now, upon pressing different buttons, we'll get different colored messages at the bottom.

Disappearing Toast Messages
Our toast message will be shown continuously, but a toast message needs to disappear after some time. So, let's add this feature in the Toast.js file.
Here, we'll use a new state variable called timeOut, which has an initial value of 4,000 milliseconds. We've also created a ref with the name timeOutRef. It's required to create a ref because we'll use it at different places in our code.
Then, we'll have a new useEffect hook. Here, we'll use the setInterval function to run every 1,000 milliseconds. We've also made it equal to the timeOutRef varible declared earlier, each time reducing 1,000 milliseconds from the timeOut state variable. If it becomes 0, which means it ran four times, we're calling the closeToast function.
In the closeToast(), set the message to null and, again, set the timeOut variable to 4,000 milliseconds. Then, clear the interval by using clearInterval.
Finally, in the onNewToast(), check if the duration is passed and set it to the timeOut variable.

Next, in the TextMessages.js file, pass the duration variable set to 2,000 milliseconds.
Now, when we click on SUCCESS, the toast message will close after 2,000 milliseconds. The ERROR and INFO toast messages will close after 4,000 milliseconds.
Android Toast Messages
Android provides support for native toast messages. We don't need to write any special logic for it.
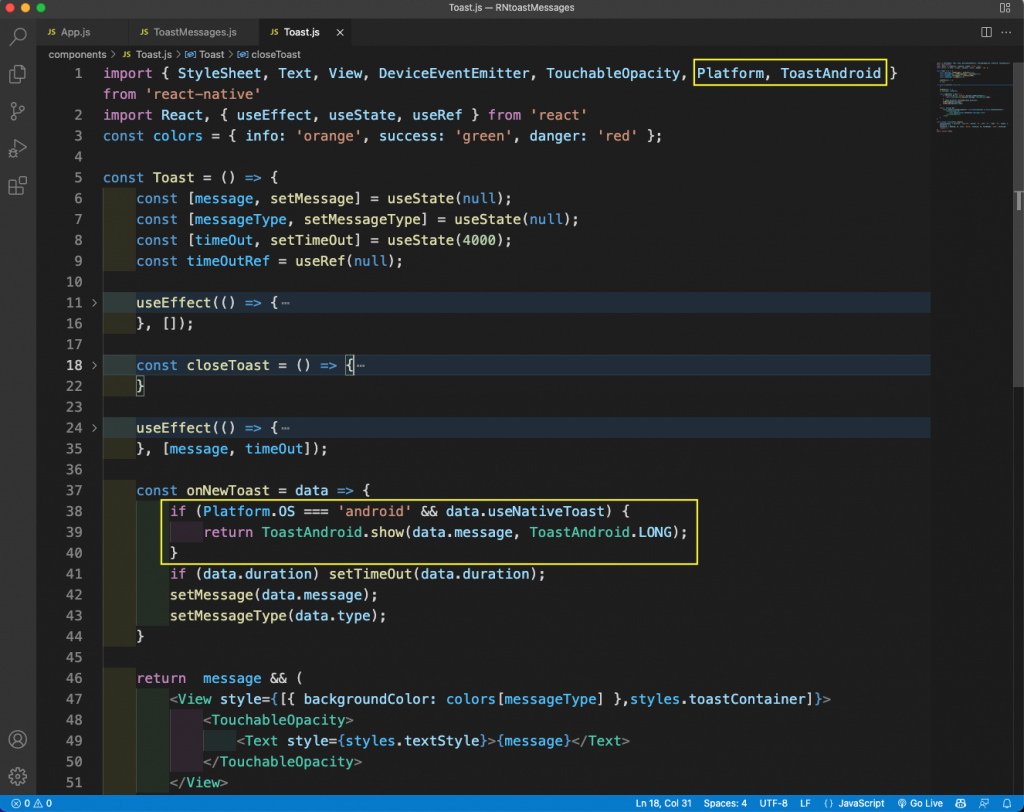
First, in the Toast.js file inside the onNewToast() file, check if the platform is Android.
If it is, use ToastAndroid to show the message. Also, pass a parameter LONG to it. This means the message will be displayed for a longer duration.
Now, in the ToastMessage.js file, update the onPress handler.
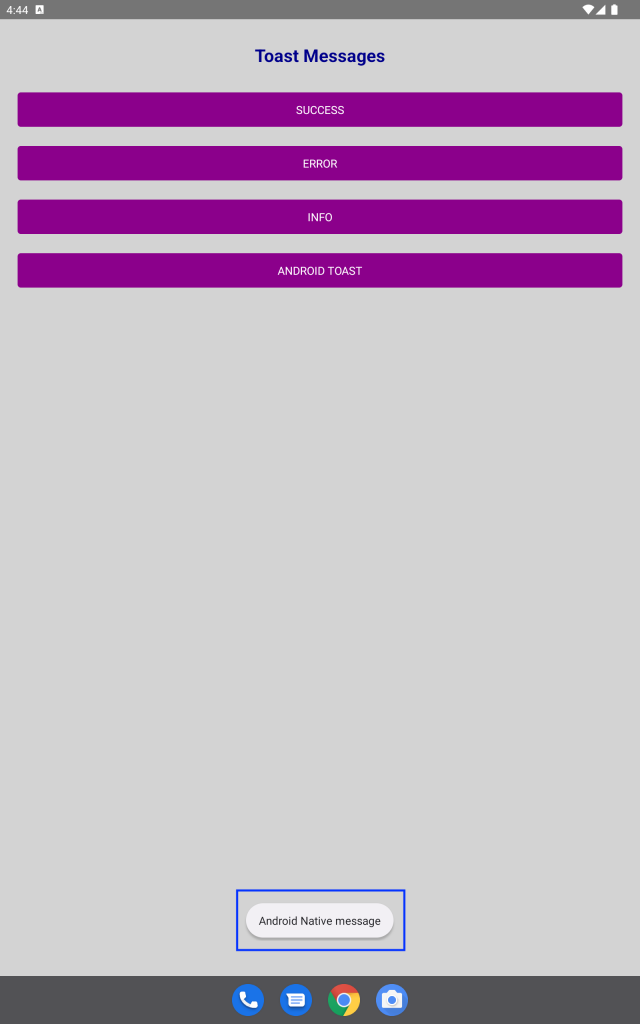
On an Android emulator, when we press the ANDROID TOAST button, we'll get a native message.
App Testing
To test the app, we'll use built-in Jest testing methods. In the __tests__ folder, remove the earlier file called app-test.js. Add a file with the name ToastMessages-test.js in it.
Now, in the ToastMessages-test.js file, add the content below. This is a simple snapshot test, which matches all the tags with the app.
Now, run the npm run test from the terminal to get the result of the test.
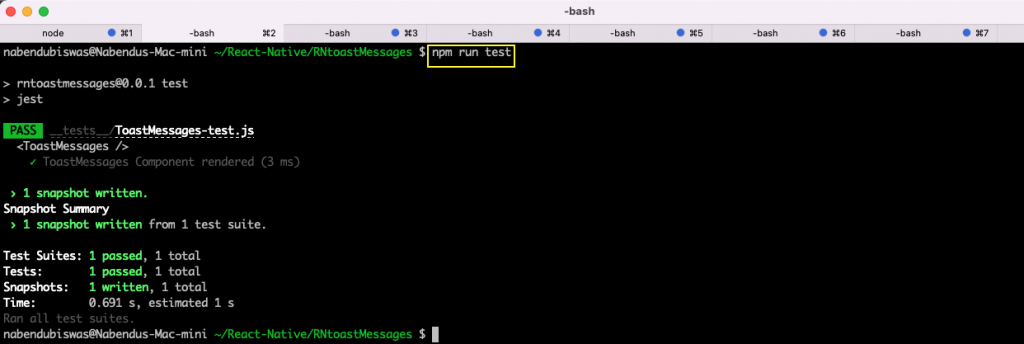
Our only test case ran successfully. However, adding the Toast.js component to the testing would require us to write a very complicated test case. To do this, we can use the no-code testing platform Waldo instead of writing all test cases manually.
With this platform, we just need to upload the APK or IPA file. We can then do user iteration like clicking on the button. After that, the test cases will be generated automatically, and our testing will be done automatically.
So, create a free Waldo account here to test its features.
Conclusion
In this post, we've learned about creating toast messages in React Native. First, we built custom toast messages, which work on both Android and iOS platforms. We've also learned about the built-in toast messages for Android.
Additionally, we tested the app through Jest, and we learned we also can test the app with the no-code testing platform Waldo.
Automated E2E tests for your mobile app
Get true E2E testing in minutes, not months.


